10.4. How to contribute to the standard library
10.4.1. What are PikaPython standard libraries?
PikaPython standard libraries are a set of cross-platform libraries for common tools such as string, time, etc.
Some of these libraries provide APIs consistent with or similar to CPython, and some provide common tools for MCU development.
10.4.2. PikaPython standard library development environment construction
The PikaPython standard library is cross-platform, so it can’t use the proprietary resources of the platform (e.g. stm32), to ensure this, the standard library is developed on linux platform.
PikaPython deploys GoogleTest unit testing framework on linux platform to provide test cases for these standard libraries, GoogleTest can be run on the developer’s local machine and also automatically in the cloud (based on Github Actions).
10.4.2.1. Build Docker container
10.4.3. Use VSCODE to connect to the container for development
10.4.3.1. Start
VSCODE provides tools to connect to containers for development, and the development experience is as good as if you were outside the container.
Select Remote, Containers, pikadev in the VSCODE sidebar, then click Open Directory to connect to Docker inside VSCODE.
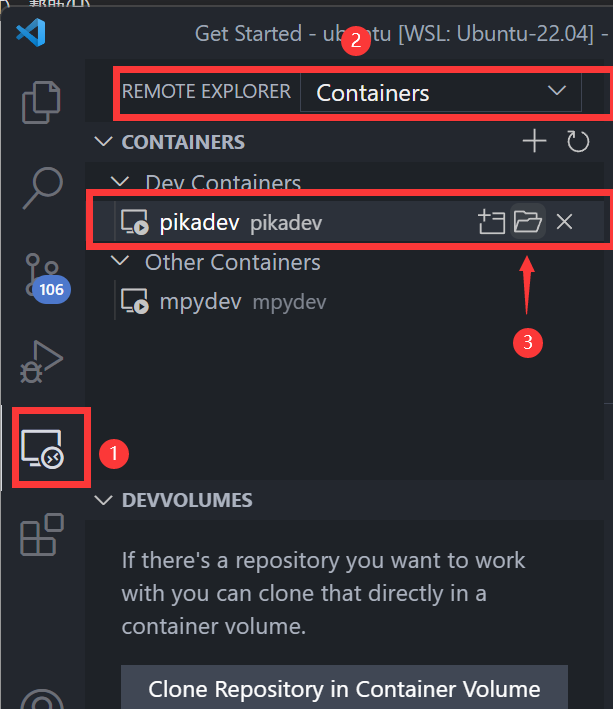
The first time you open it, you need to wait for some plugins to be installed automatically, then you can open it again and start it directly.

cd to ~/pikascript/port/linux, then type code . to switch the working path to pikascript/port/linux

10.4.3.2. Compile and run
Initialize
sh pull-core.sh # Update kernel source code
Pre-compile and configure CMake
sh init.sh
Compile
sh only_make.sh
test
sh gtest.sh # run google test
sh ci_benchmark.sh # run benchmark
sh valgrind.sh # run valgrind
run
sh run.sh # Start REPL
10.4.3.3. Development
The pyi declaration files for the standard library are in the package/pikascript directory. The standard library includes PikaStdLib.pyi, PikaStdData.pyi, PikaDebug.pyi, PikaStdTask.pyi, etc.
The implementation files are in the PikaStdLib folder.
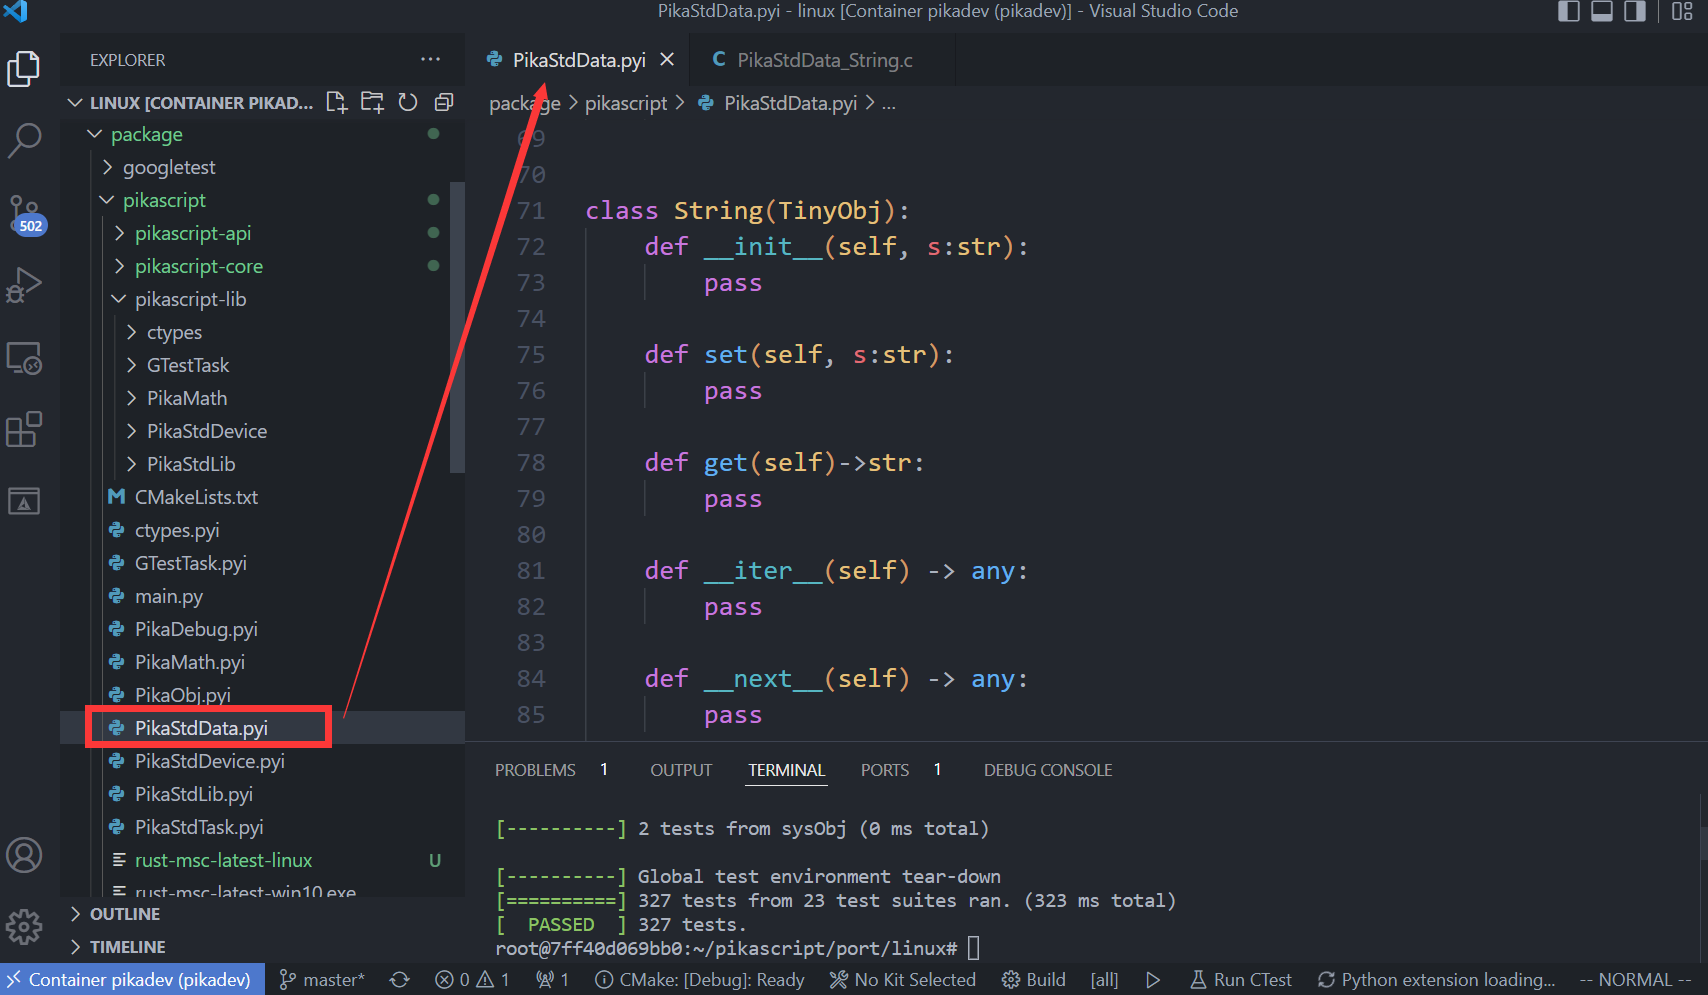
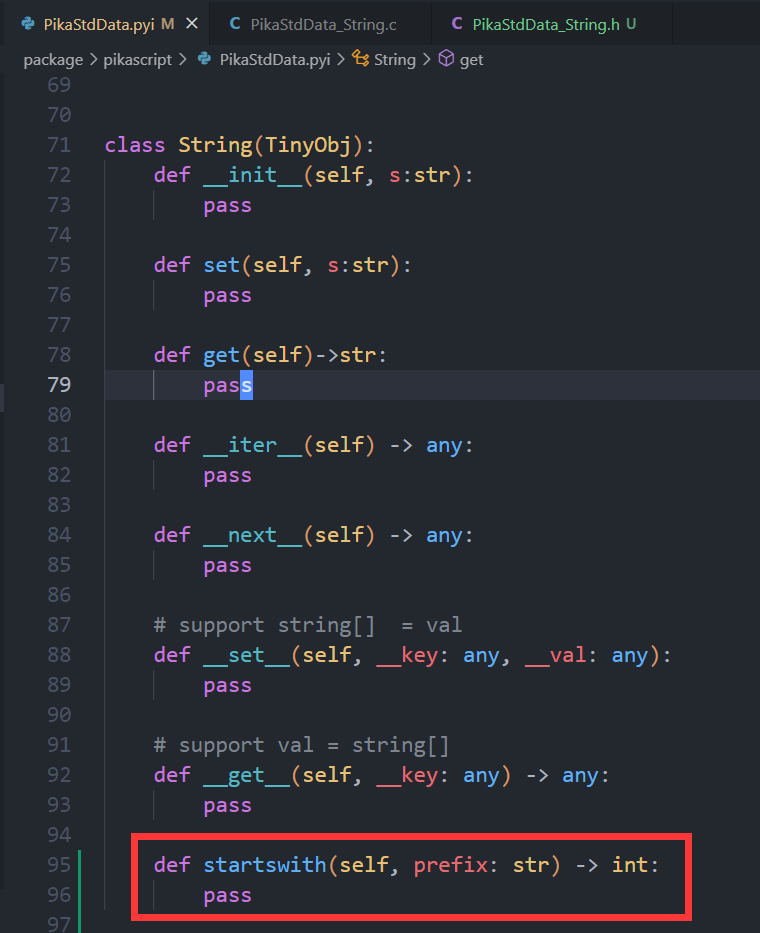
Then you can add classes, or functions to the standard library, for example, add a startswith() method to the PikaStdData.String class by first adding a declaration for the startswith() method under the String class in PikaStdData.pyi.
Then run.
sh init.sh
to pre-compile and reconfigure CMake.
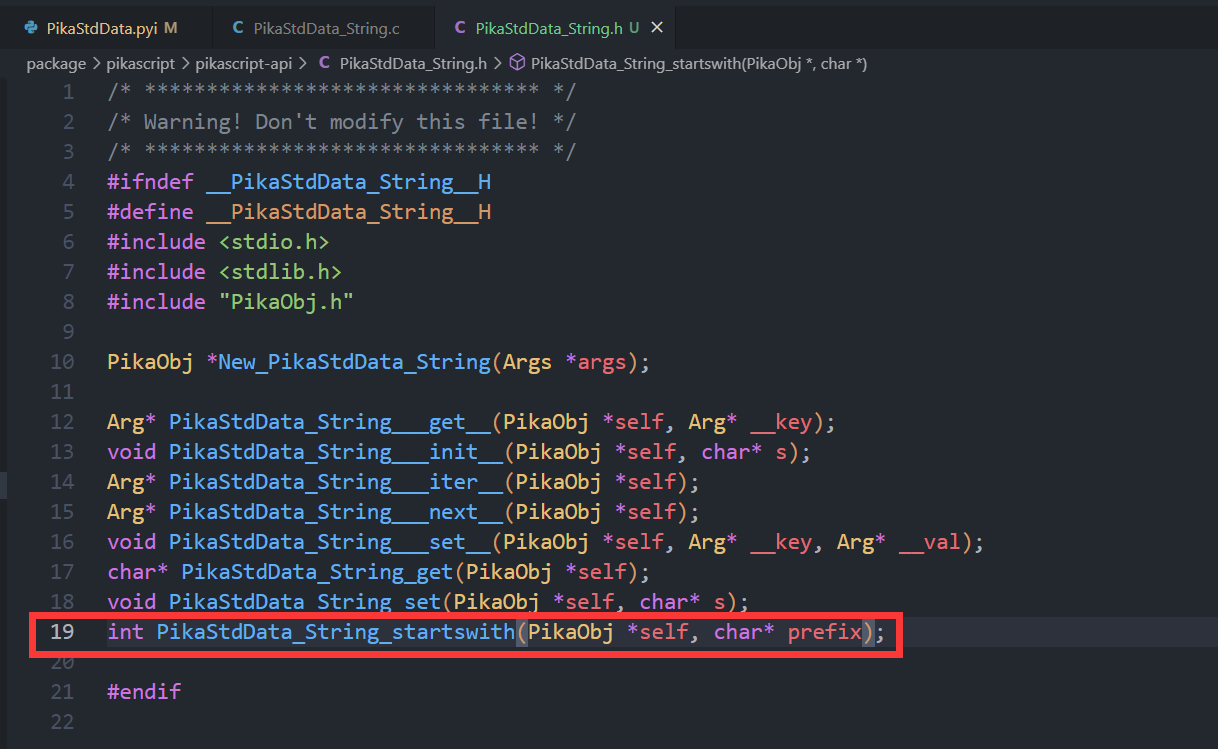
Then open PikaStdData_String.h and you will find the c function declaration for the automatically generated startswith method.
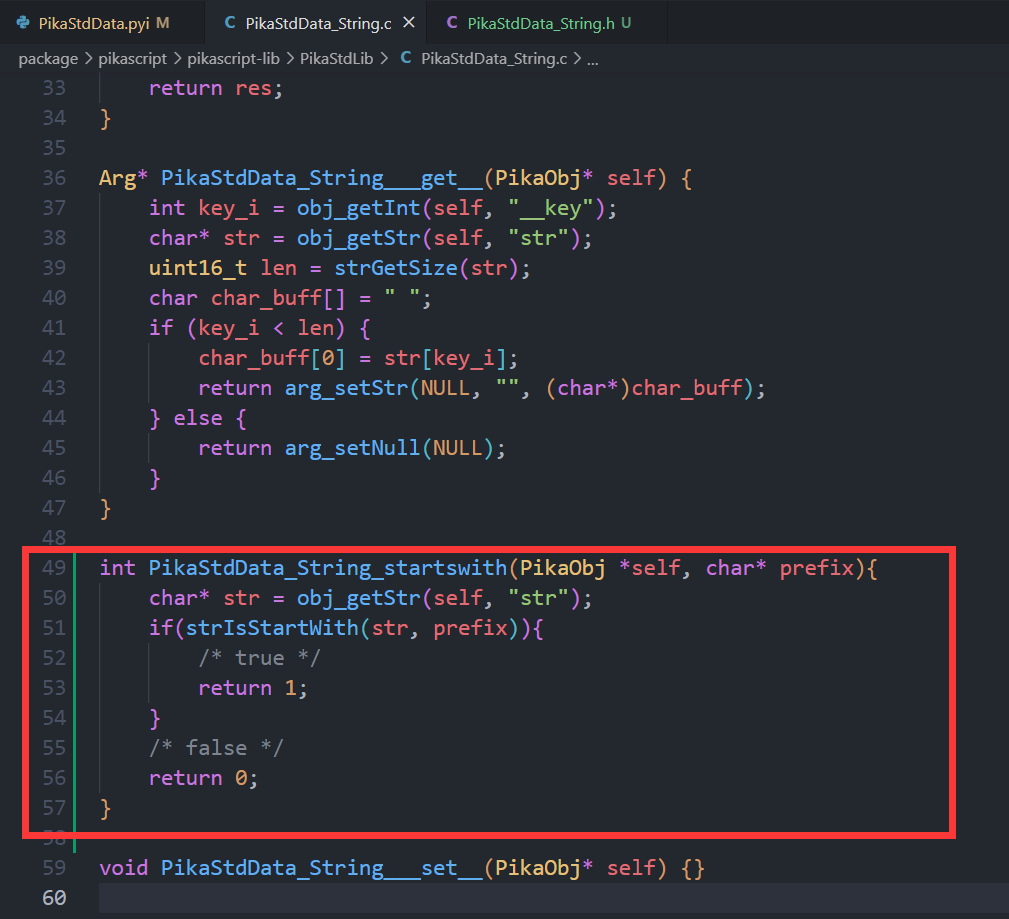
Next, implement this function in PikaStdData_String.c.
10.4.3.4. Testing
Then you can run GoogleTest to see if it breaks the original code.
sh gtest.sh

If the tests all pass, you can write the code for the functional tests.
The test code is in the test directory.
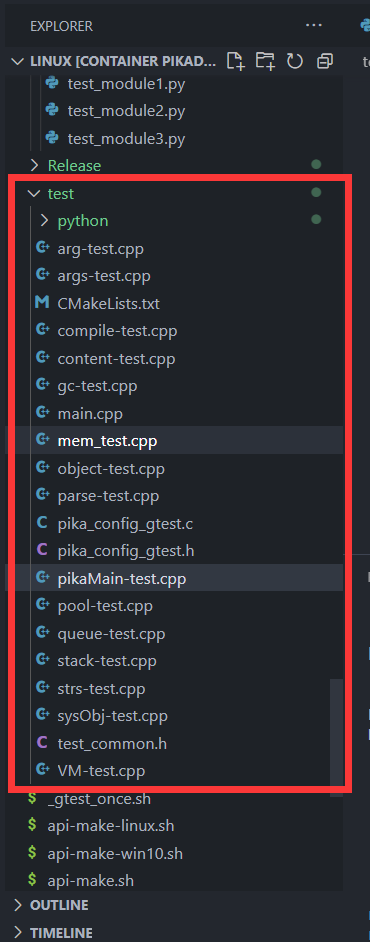
The tests for the standard library can be placed under pikaMain-test.cpp.
The contents of a test case are as follows: first, declare a test case with the TEST macro, then fill in the name of the test group, and the name of the test case, the name of the test group can be the same as the other test cases in the current file, the test name needs to be different from the other test cases.
TEST(<test group>, <test name>){

    /* do something */

    /* assert */

    /* deinit */
}
The measurement example is divided into three main parts.
Running
Judgment
Analysis
Here is a typical test case, we copy this test case and change the name of the test case.
TEST(pikaMain, a_signed) {
    /* init */
    pikaMemInfo.heapUsedMax = 0;
    PikaObj* pikaMain = newRootObj("pikaMain", New_PikaMain);
    /* run */
    obj_run(pikaMain, "a = -1\n");
    /* collect */
    int a = obj_getInt(pikaMain, "a");

    /* assert */
    EXPECT_EQ(-1, a);

    /* deinit */
    obj_deinit(pikaMain);
    EXPECT_EQ(pikaMemNow(), 0);
}
We modify the obj_run() part, run a python script, and then take the result and use the EXPECT_EQ macro to determine the result.
TEST(pikaMain, string_startswith) {
    /* init */
    pikaMemInfo.heapUsedMax = 0;
    PikaObj* pikaMain = newRootObj("pikaMain", New_PikaMain);
    /* run */
    obj_run(pikaMain,
    "a = PikaStdData.String('test')\n"
    "res1 = a.starswith('te')\n"
    "res2 = a.startswith('st')\n"
    );
    /* collect */
    int res1 = obj_getInt(pikaMain, "res1");
    int res2 = obj_getInt(pikaMain, "res2");

    /* assert */
    EXPECT_EQ(res1, 1);
    EXPECT_EQ(res2, 0);

    /* deinit */
    obj_deinit(pikaMain);
    EXPECT_EQ(pikaMemNow(), 0);
}
The EXPECT_EQ macro is provided by GoogleTest to determine if two values are equal, if not, GoogleTest will throw an error, you can check GoogleTest’s documentation to learn more.
Then we run GoogleTest again
sh gtest.sh
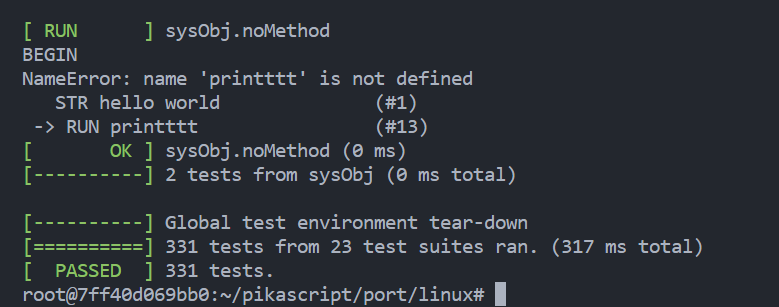
As you can see, the number of test cases is 331, one more than the previous 330, and they all pass, which means the test is successful.
10.4.3.5. Commit
Once the test passes, you can commit the changes.
Before committing the changes, you need to fork the PikaPython repository, Gitee and Github are both available.
The first time you commit, you need to change your commit information, including your username, email, and the repository address after fork.
git config --global user.name < your user name >
git config --global user.email < your email >
git config remote.origin.url < your forked git repo url >
Run
sh push-core.sh
Commit the modified code to ~/pikascript/package/PikaStdLib.
Then run
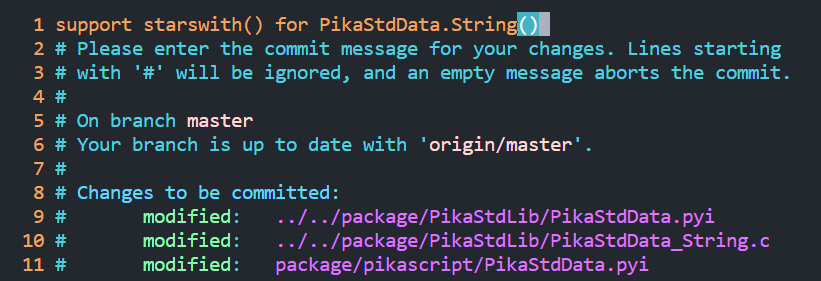
git commit -a
Enter the commit information, and if you are not familiar with vim, learn the basics of using vim yourself.
Next you can commit
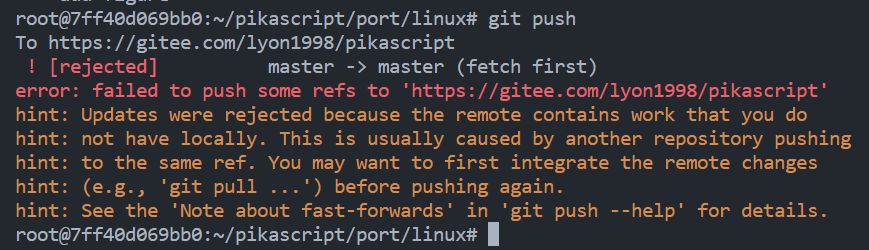
git push
If there is a conflict, you can first
git pull --rebase
and then git push. For more information on how to use git, see the git manual.
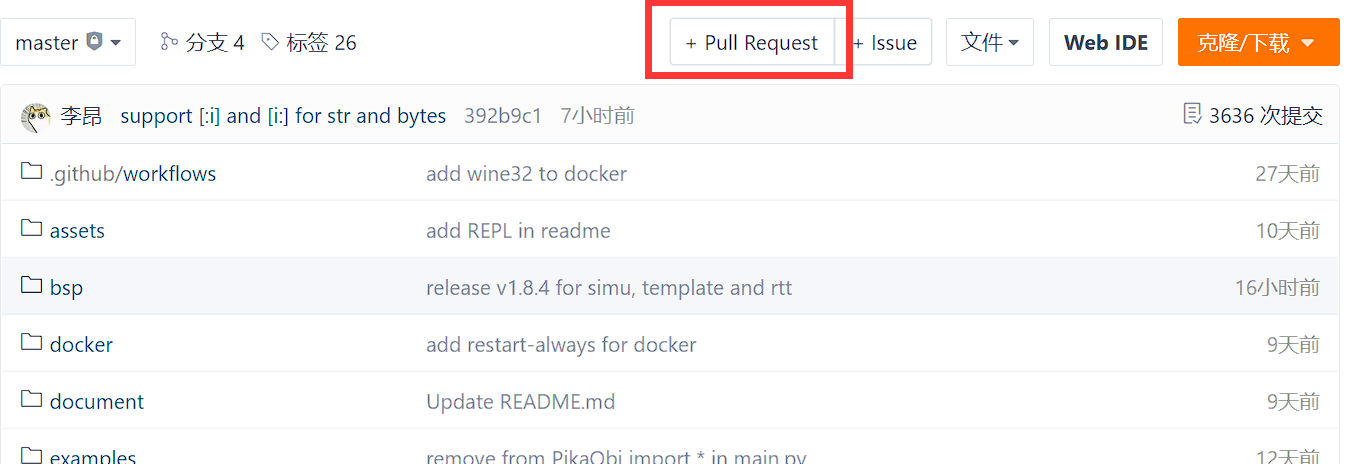
Then launch a Pull Request in gitee / github