2.1. How to Get Started with PikaPython using KEIL Simulator
In this article, we introduce a new way of playing PikaPython without hardware, i.e. using simulation in MDK. The target board of simulation is stm32f103, and you can experience the fun of pikascript immediately after downloading the project.
2.1.1. Create project
Open the pikascript official website http://pikascript.com
Select simulation-keil and click “Start Generation”

Unzip the downloaded zip archive and open the project
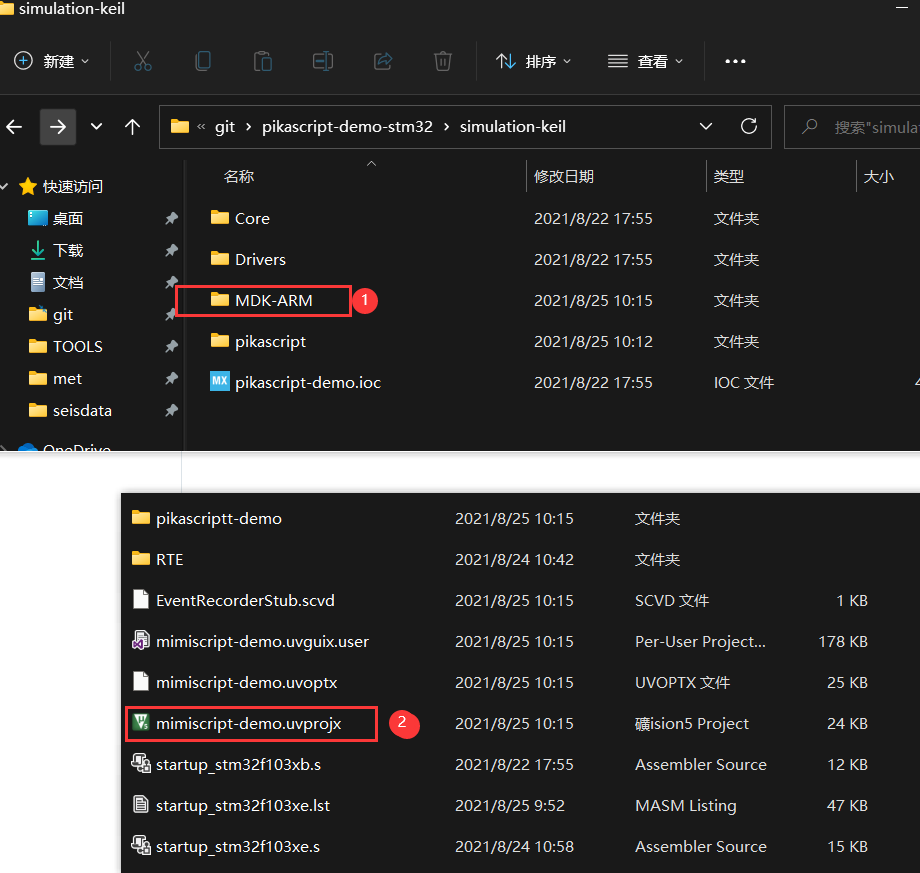
2.1.1.1. Run the simulation project
Make sure you have select the simulator as the debugging target

Compile and debug:

Once entering the debug session, make sure you have opened the serial windows as shown below:
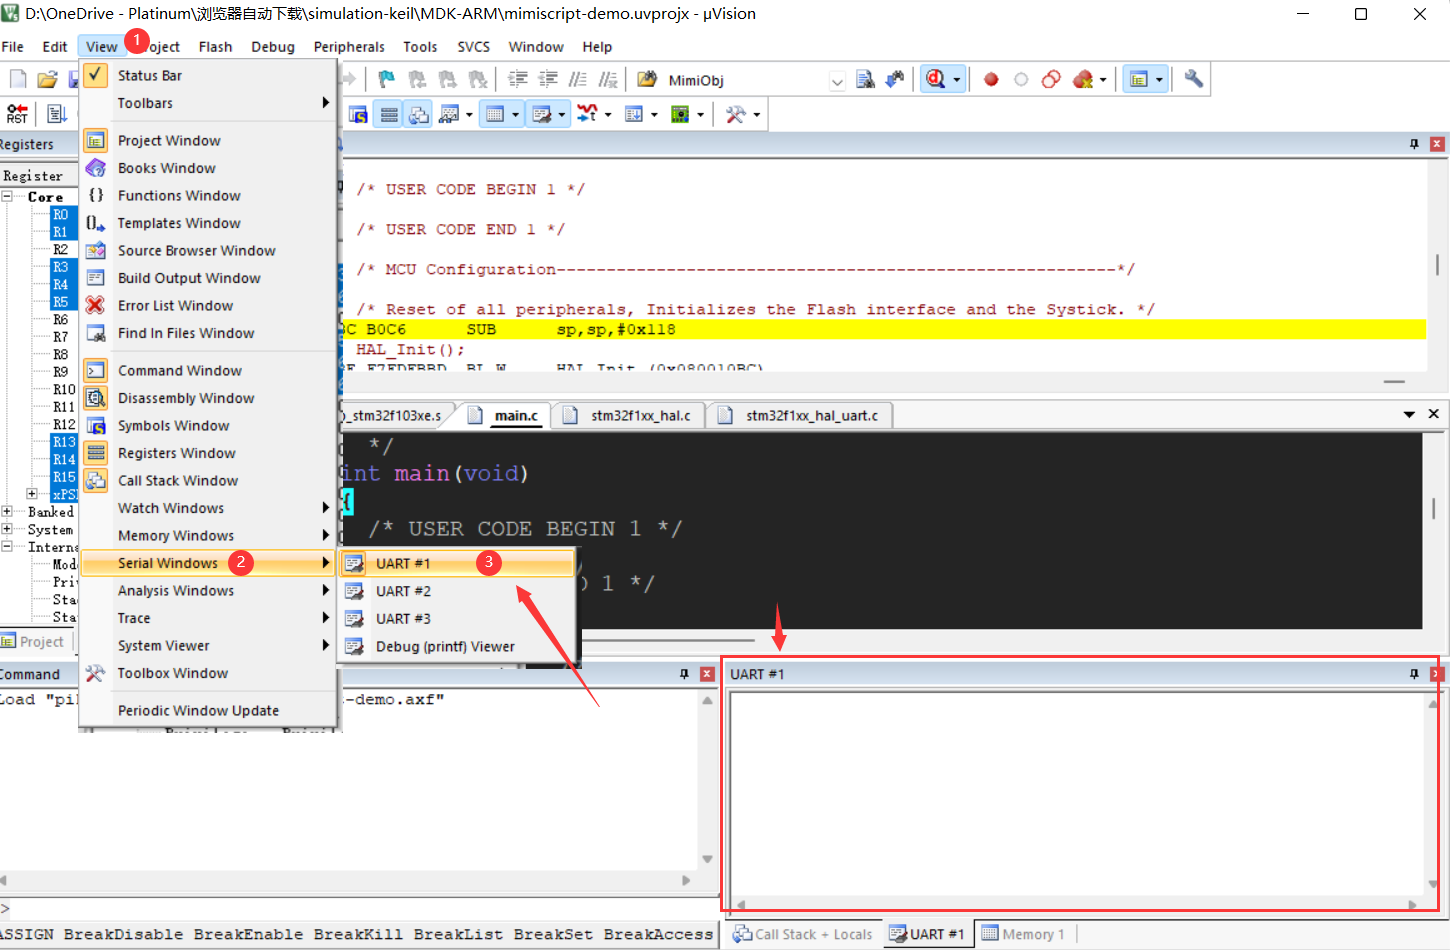
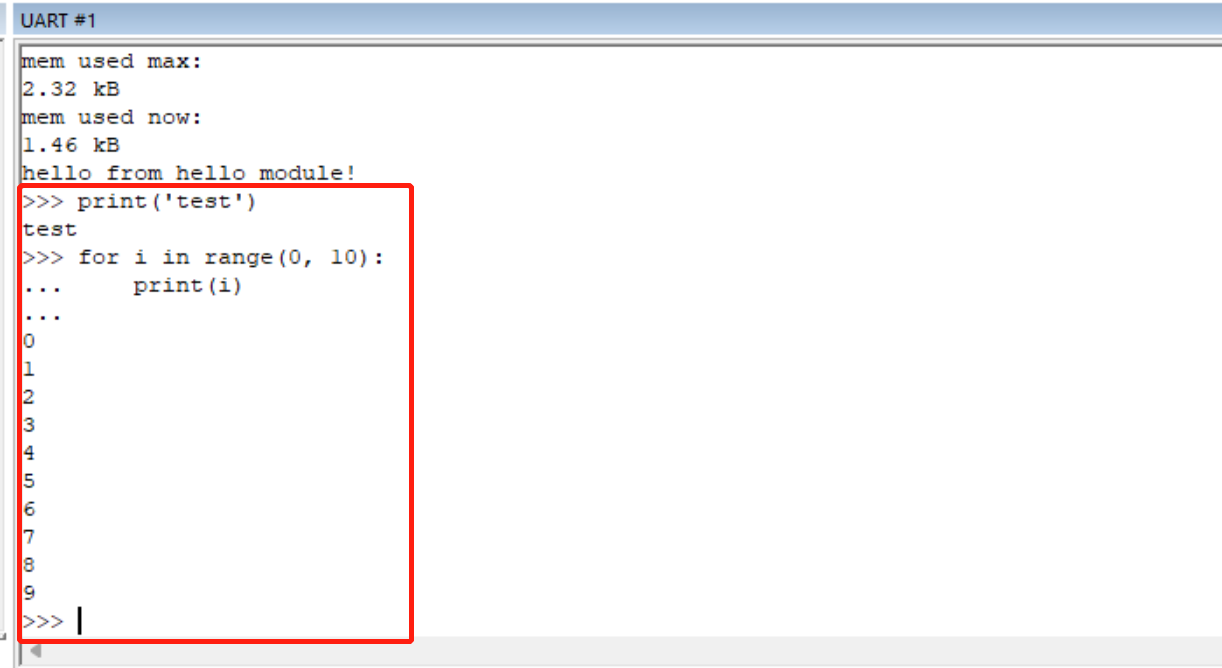
run and check the output:

2.1.2. REPL
Python scripts can be run interactively by typing them directly in the UART window.
NOTE: Please use With 4 white-spaces for indentation.
2.1.3. How to Run a different python script
Open the main.py in any editor, e.g. vscode:

In main.py, you might see something similar to:
# main.py
import Device
import PikaStdLib

led = Device.LED()
uart = Device.Uart()
mem = PikaStdLib.MemChecker()

print('hello wrold')
uart.setName('com1')
uart.send('My name is:')
uart.printName()
print('mem used max:')
mem.max()
print('mem used now:')
mem.now()
This script uses standard python3 syntax. Suppose we have already modified this script, so how to run it on the device?
The interesting part is, pikascript uses a method similar to java, i.e. it is semi-compiled and semi-interpreted. For example, the pikascript compiler compiles classes and methods, while PikaVM interprets method-calls and object-creation/destruction at runtime.
The pikascript compilation is a two-step process:
Using pikascript compiler to compile the
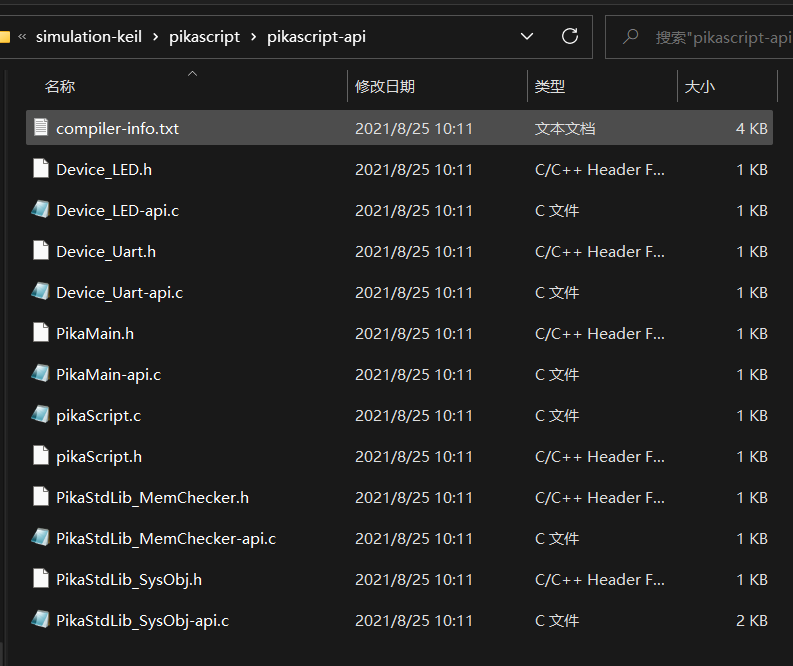
.pyfiles into.cand.hfiles and store them in thepikascript-apifolder.Using the ordinary c compiler to compile all the c source files and generate an executable image for the target device.
Double-click rust-msc-vxx.yy.zz.exe to run the pika precompiler which is written in Rust.
NOTE: Here xx.yy.zz is the version number.

If you want to ensure that the updated script is compiled as expected, please
delete all files in the
pikascript-apifolder,run the precompiler and
check whether the new
.cand.hfiles have been generated or not.
IMPORTANT: Please do NOT remove the pikascript-api folder but only the files inside.
Here is an example that shows the *.c and *h files generated in the pikascript-api folder
Now, let’s modify main.py as a practice:
import Device
import PikaStdLib

led = Device.LED()
uart = Device.Uart()
mem = PikaStdLib.MemChecker()

print('hello wrold')
uart.setName('com1')
uart.send('My name is:')
uart.printName()
print('mem used max:')
mem.max()
print('mem used now:')
mem.now()

# new code start
print('add new code start')
uart.setName('com2')
uart.printName()
print('add new code end')
# new code end
As you can see, we have added 4 new lines to the main.py. Let’s compile and run:
Compile pikascript-api

Compile the keil project and enter the debugging session:

run and observe the output

As shown above, there are 3 new lines in the output, indicating that our modification works as expected.
That’s all, enjoy!!